HOW TO USE
Audio Recording
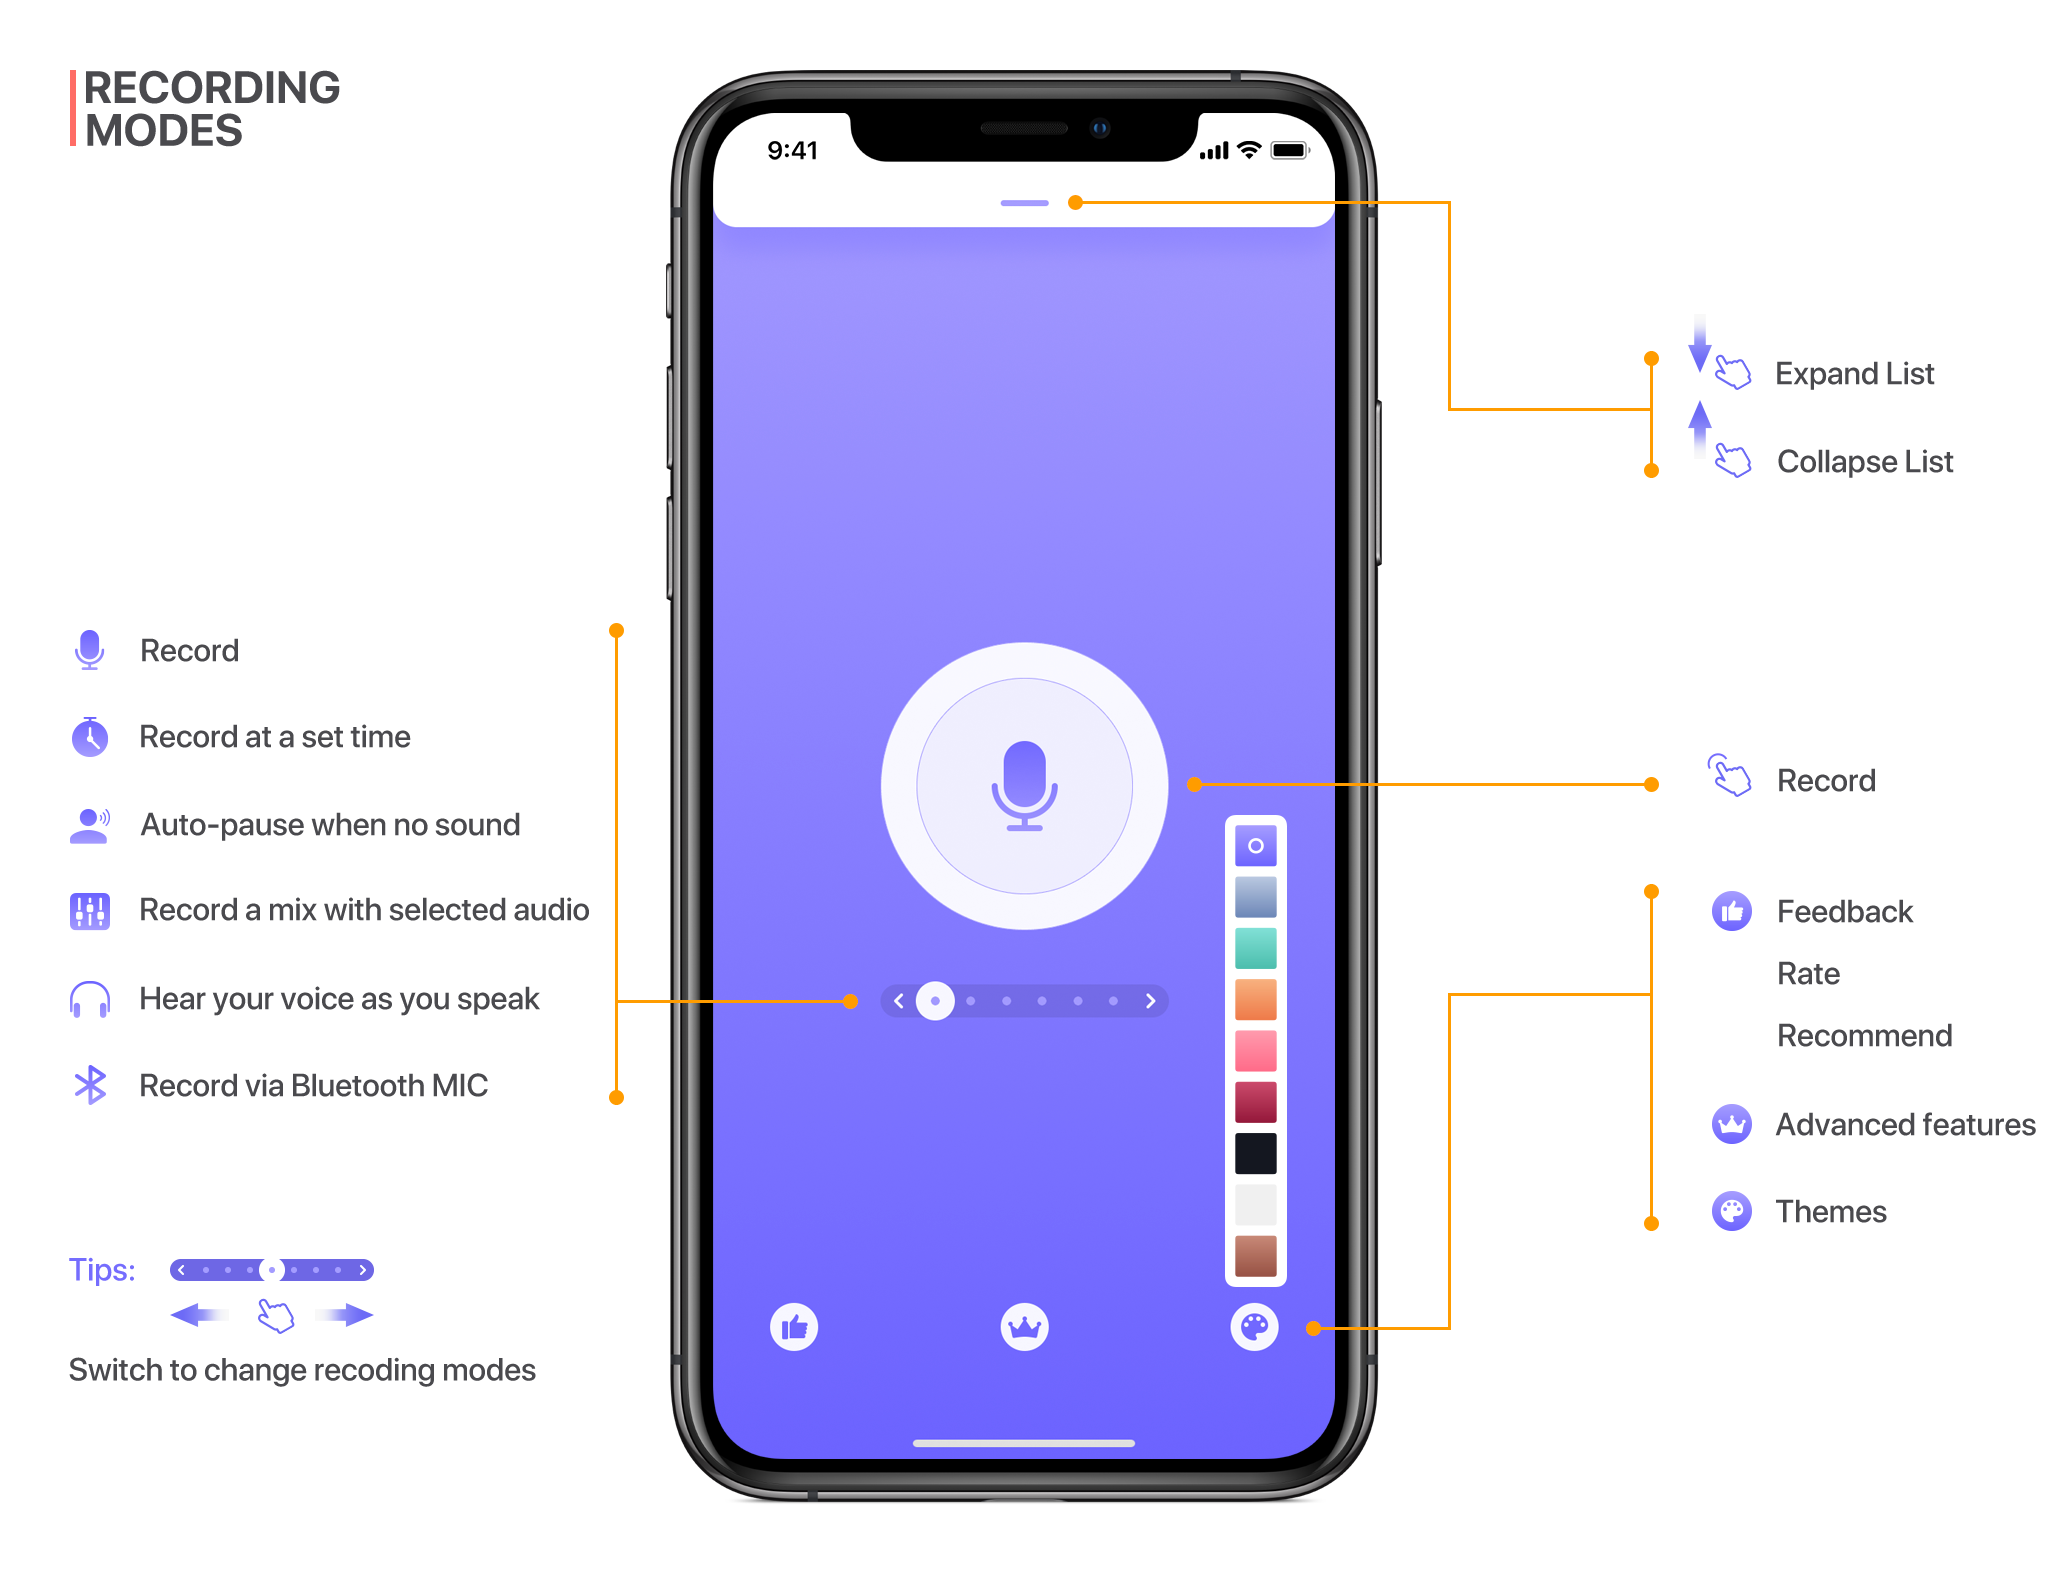
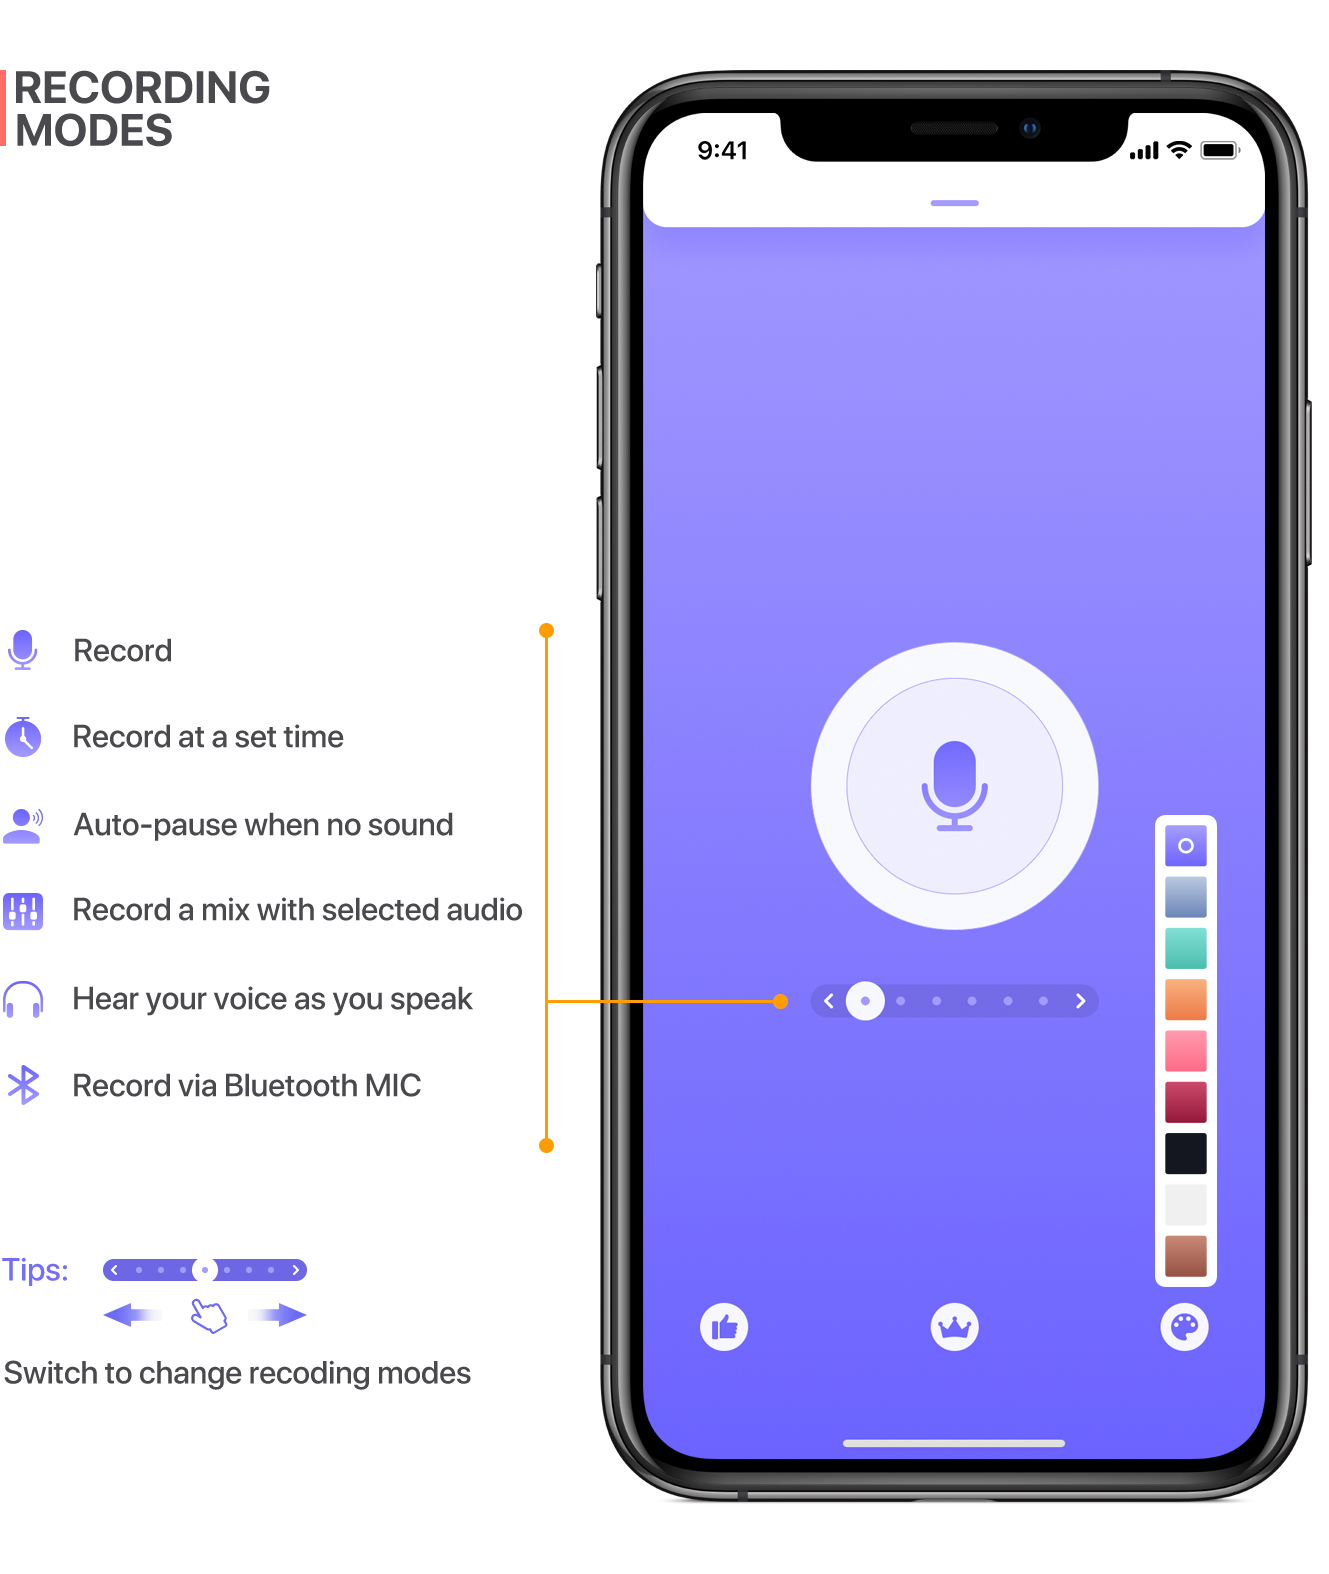
1. Record at a set time.
Switch to the “Record at a set time” mode,  tap the button to set the start time and end time, then start recording at the set time automatically.
2. Auto-pause when no sound.
Switch to the “Hear your voice as you speak” mode,  then tap the button to start recording, the voice is automatically detected and recorded.
3. Record a mix with selected audio.
Switch to the “Record a mix with selected audio” mode,  then select audio or video to mix recording.
4. Hear your voice as you speak.
Switch to the “Hear your voice as you speak” mode,  then tap the button for headphone monitoring while recording. You can set the delay time. Need to plug in headphones or connect other external audio devices such as AirPods, Bluetooth speaker, etc.
5. Record via Bluetooth MIC.
Switch to the “Record via Bluetooth MIC” mode,  then tap the button and select the Bluetooth device to start recording.
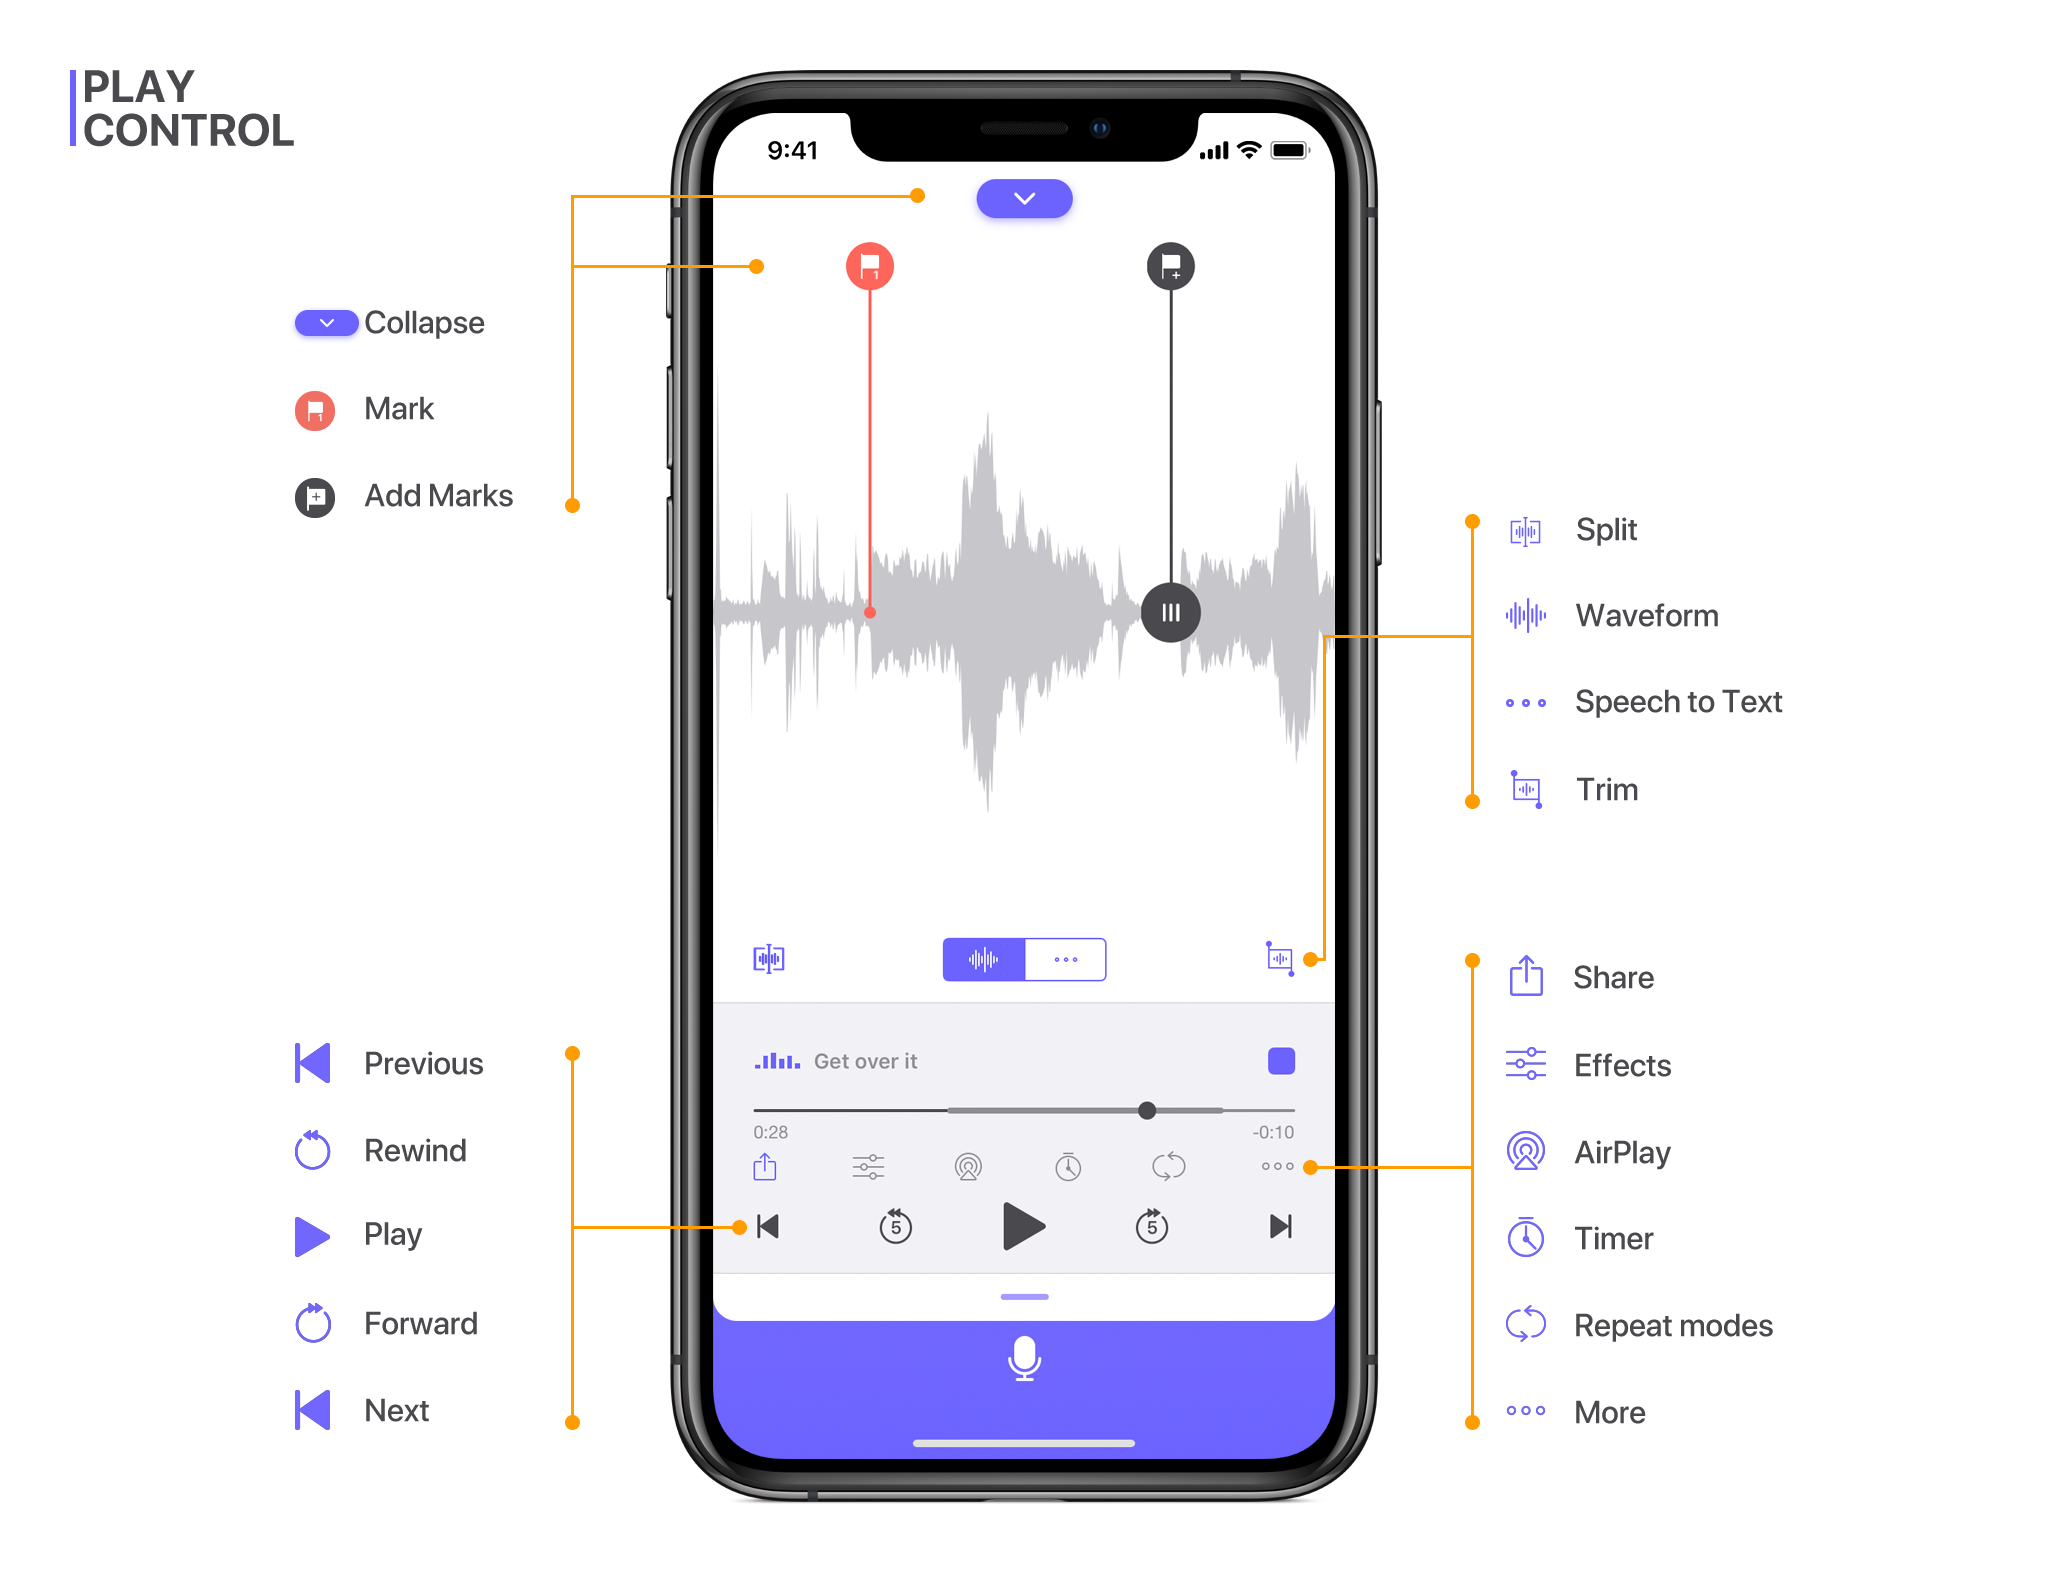
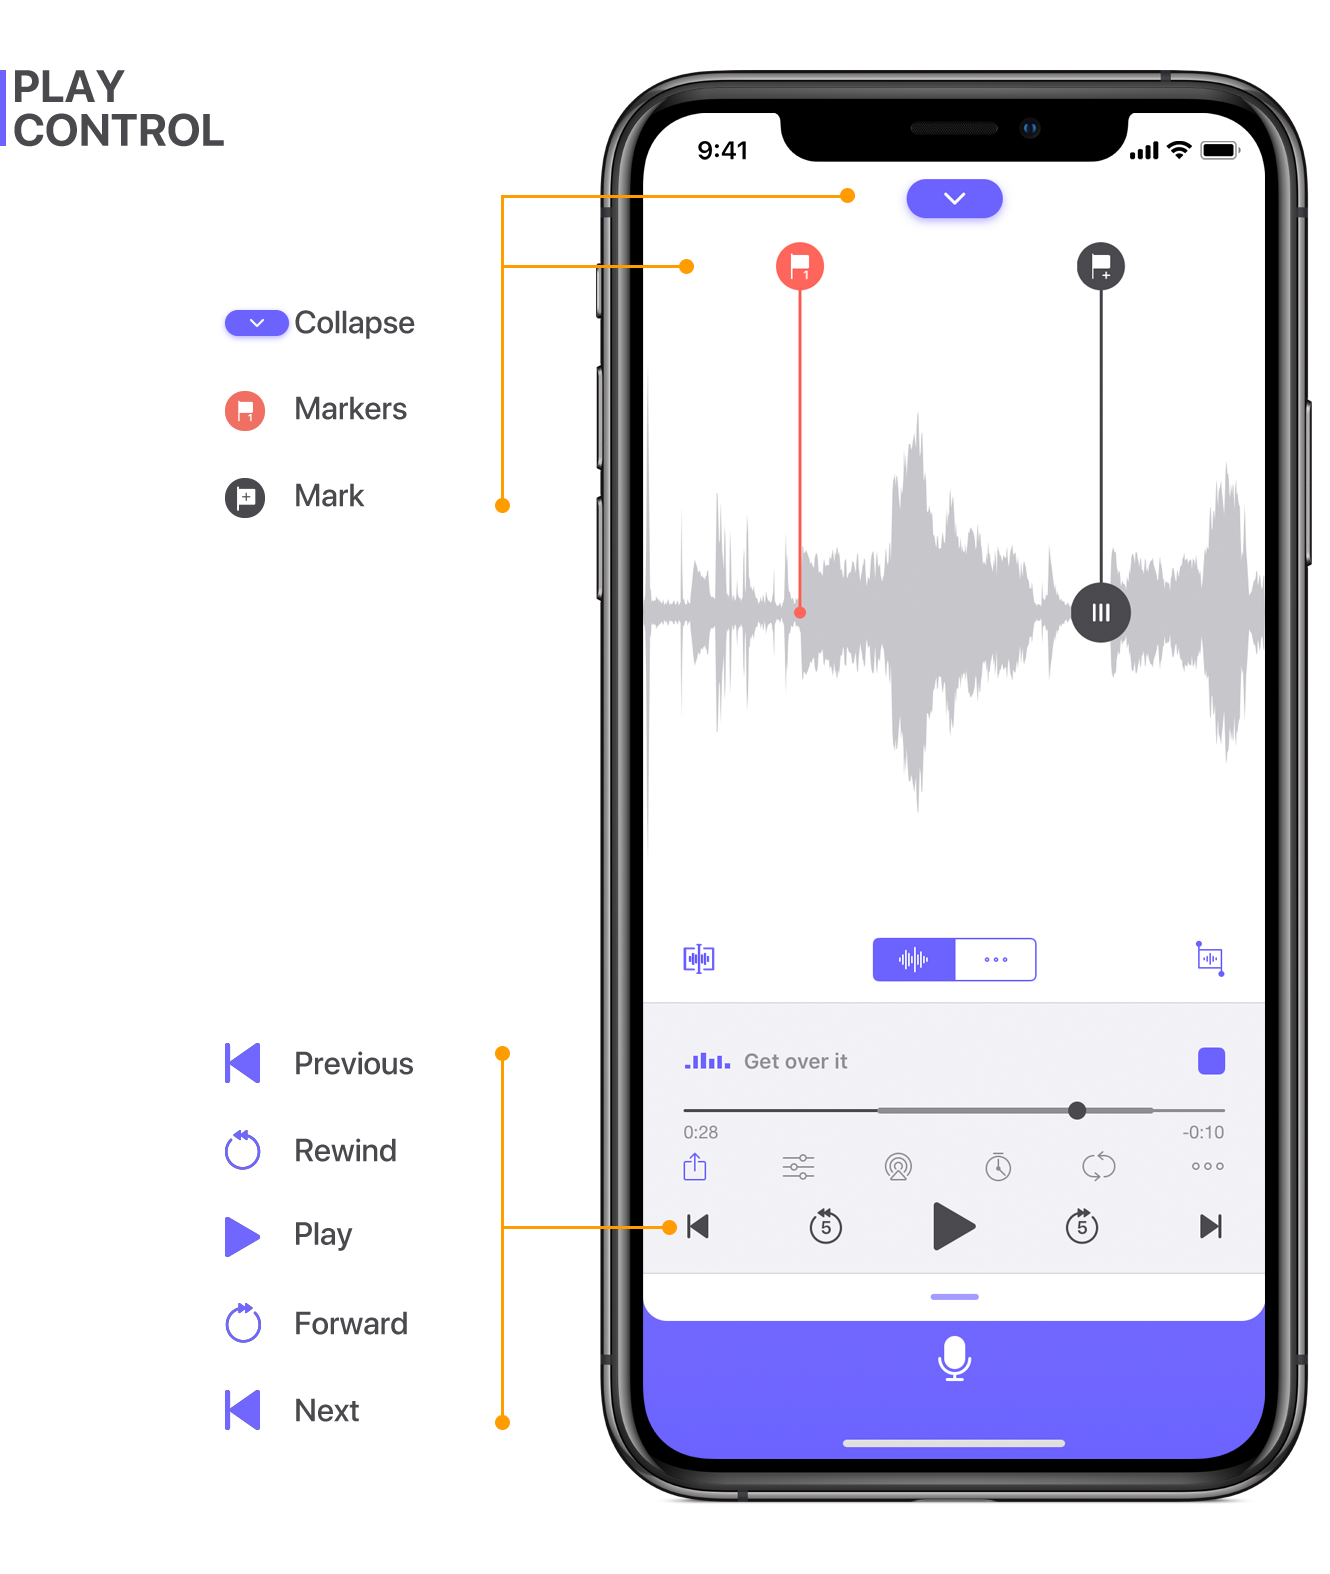
6. Mark important points.
Tap button in the lower left corner to mark important points while recording. You can rename these markers and find these important points during playback and editing quickly.
Audio Editing
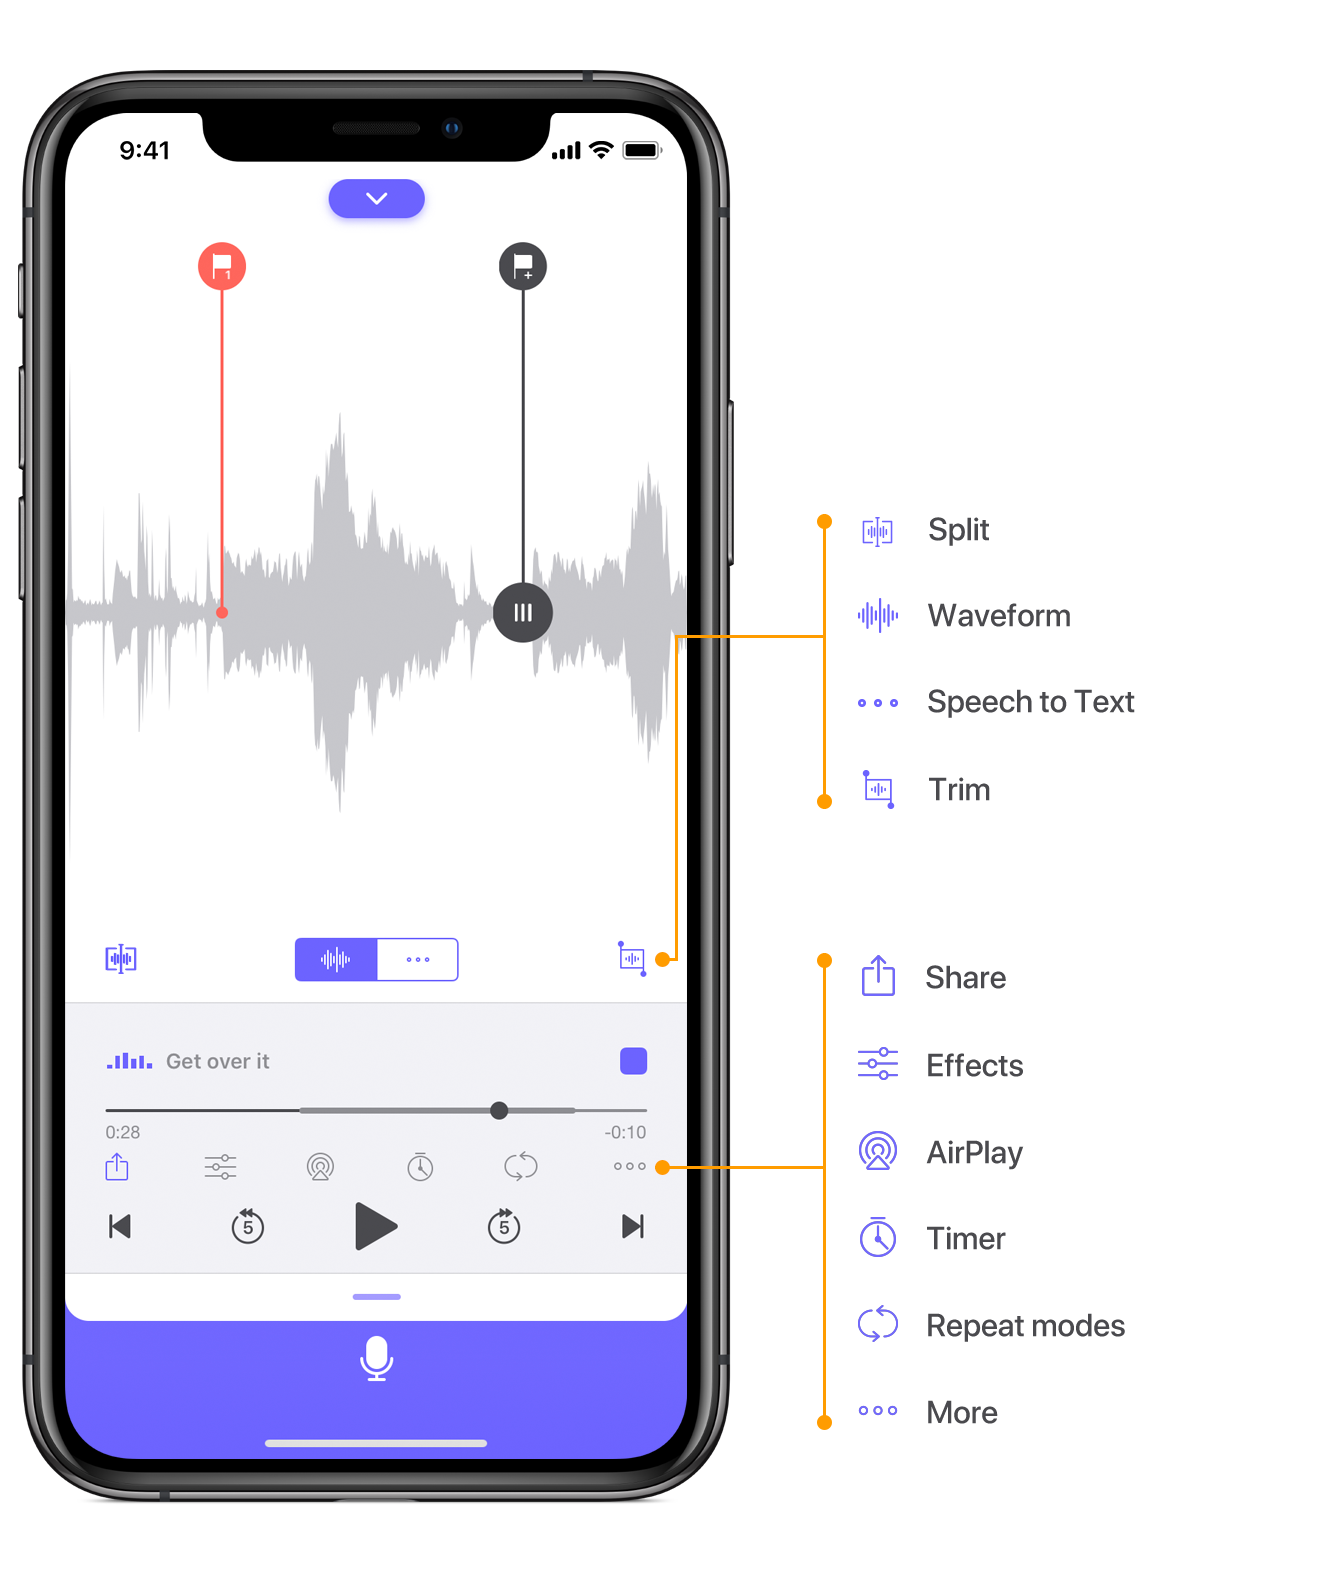
1. Trim
Tap a recording - “UP” button - “Edit” button
 in the lower right corner. Drag the handles to select the part you would like to trim. To determine where you want to trim your recording, press the Play button. Then, tap the “Keep” to keep the selected part and “Delete” to delete the selected part.
2. Cut/Copy/Paste
Tap a recording - “UP” button- “Edit” buttonin the lower right corner. Drag the handles to select the part you would like to cut/copy. To determine where you want to cut your recording, press the Play button.Then, tap the “Cut” or “Copy” to cut or copy the audio clip to the clipboard. Now, return to the file list and tap another recording - “UP” button- “Edit” button in the lower right corner. Select a point and paste the clip here.
3. Split
Tap a recording - “UP” button- “Edit” button in the lower left corner. Drag the handle and tap the “Split” to split the recording from this point into two recordings.
4. Insert
Tap a recording - “UP” button- “Edit” buttonin the lower left corner. Drag the handle and tap the “Insert” to select an audio clip and insert it at this point.
5. Join
Tap a recording - “UP” button- “Edit” buttonin the lower left corner. Tap the “Join”, then select audio to combine the two audio clips.
6. Mix
Tap a recording - “UP” button- “Edit” buttonin the lower left corner. Tap the “Mix”, then select audio to mix the two audio clips.
7. Fade in/Fade Out/Mute
Tap a recording - “UP” button- “Edit” buttonin the lower right corner. Drag the handles to select the part you would like to edit. To determine where you want to edit your recording, press the Play button. Then, tap the “Fade In”, “Fade Out” or “Mute” to edit the selected part.
Audio Changer
1. Change Speed and Pitch
Select a recording - “Effects” button in the lower left corner. Select the speed and pitch you need. “Apple to File” to save the change.
2. Reduce Noise
Select a recording - “Effects” button in the lower left corner. Turn on the “Reduce Noise” and listen to the effect. “Apple to File” to save the change.
Audio Playback
1. Markers
Tap a recording - “UP” button. Tap button to mark important points while playing. You can rename these markers and find these important points during playback and editing quickly.
2. Repeat A/B
Tap a recording - “Edit” button- “Repeat Mode” - “Repeat A/B” . Drag the handles to select the A and B point to repeat A/B.
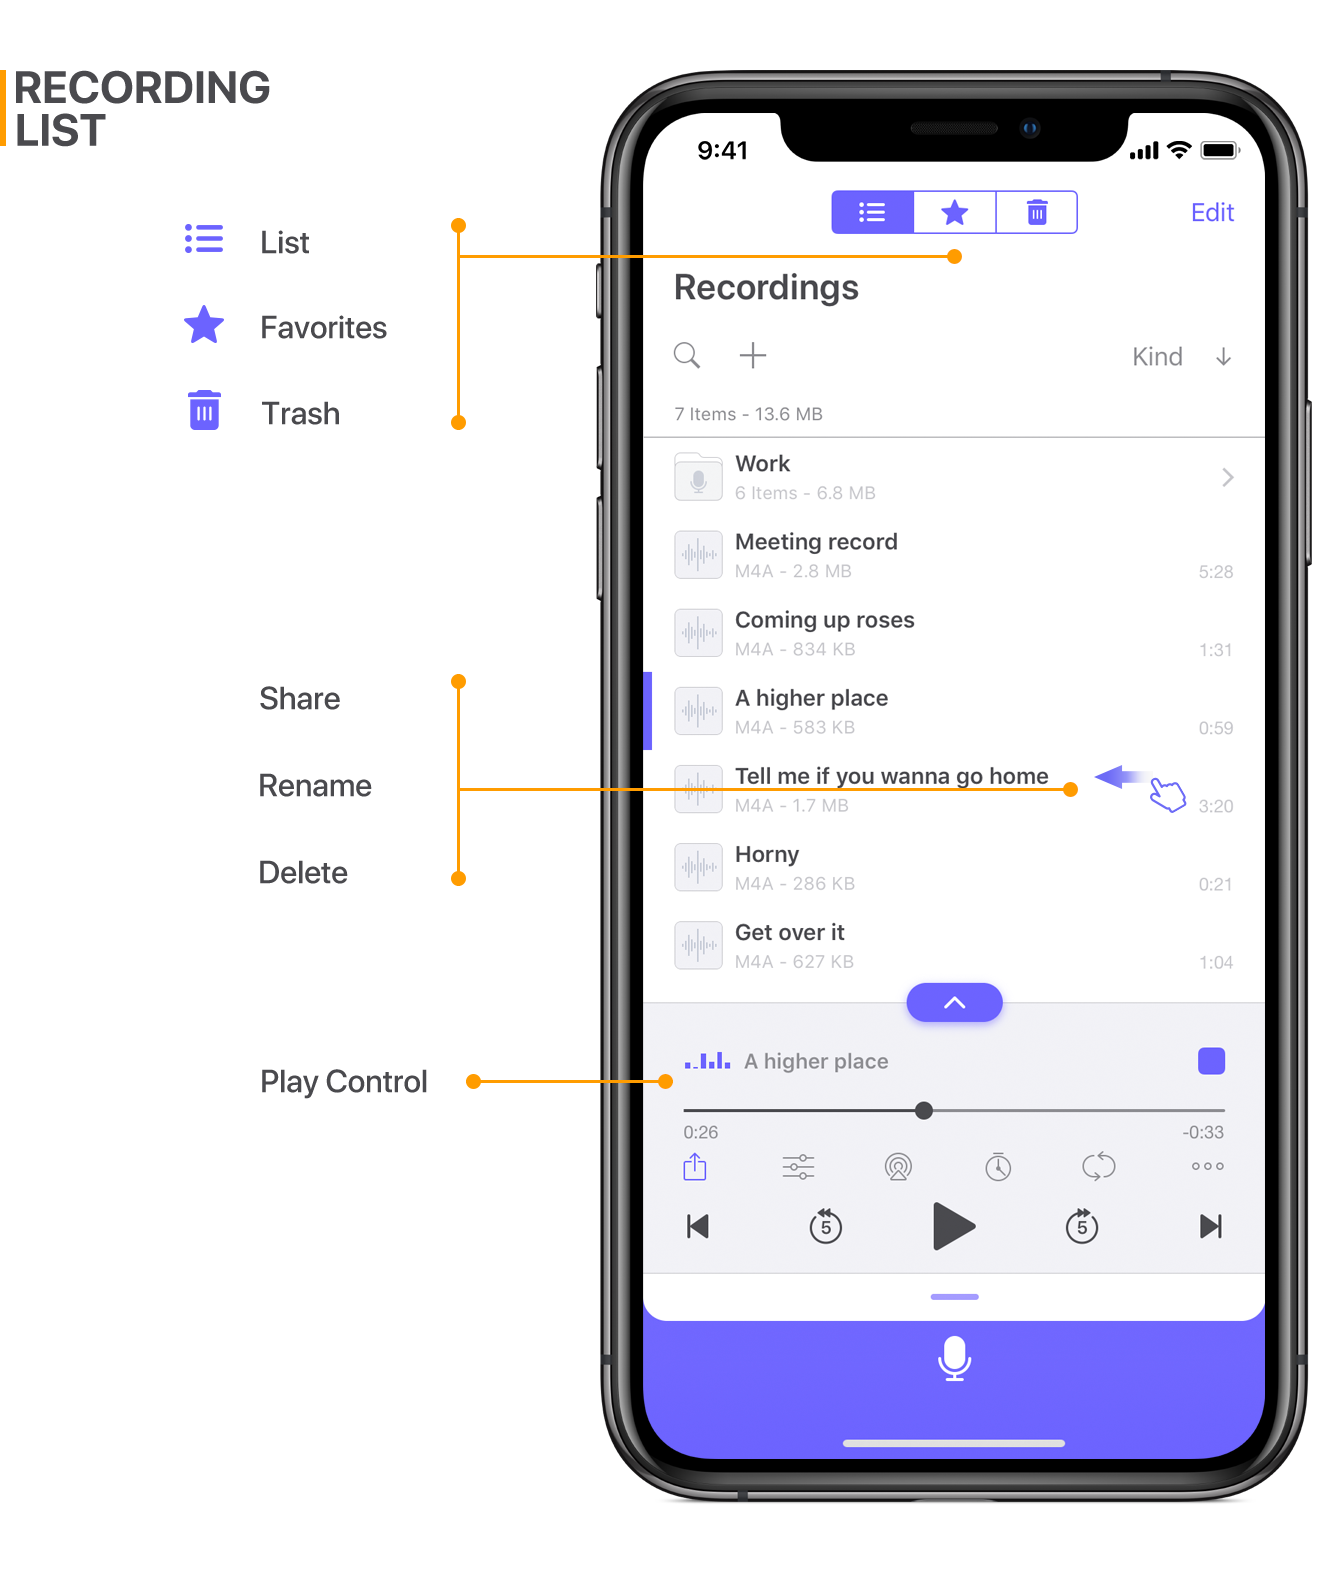
Audio Management
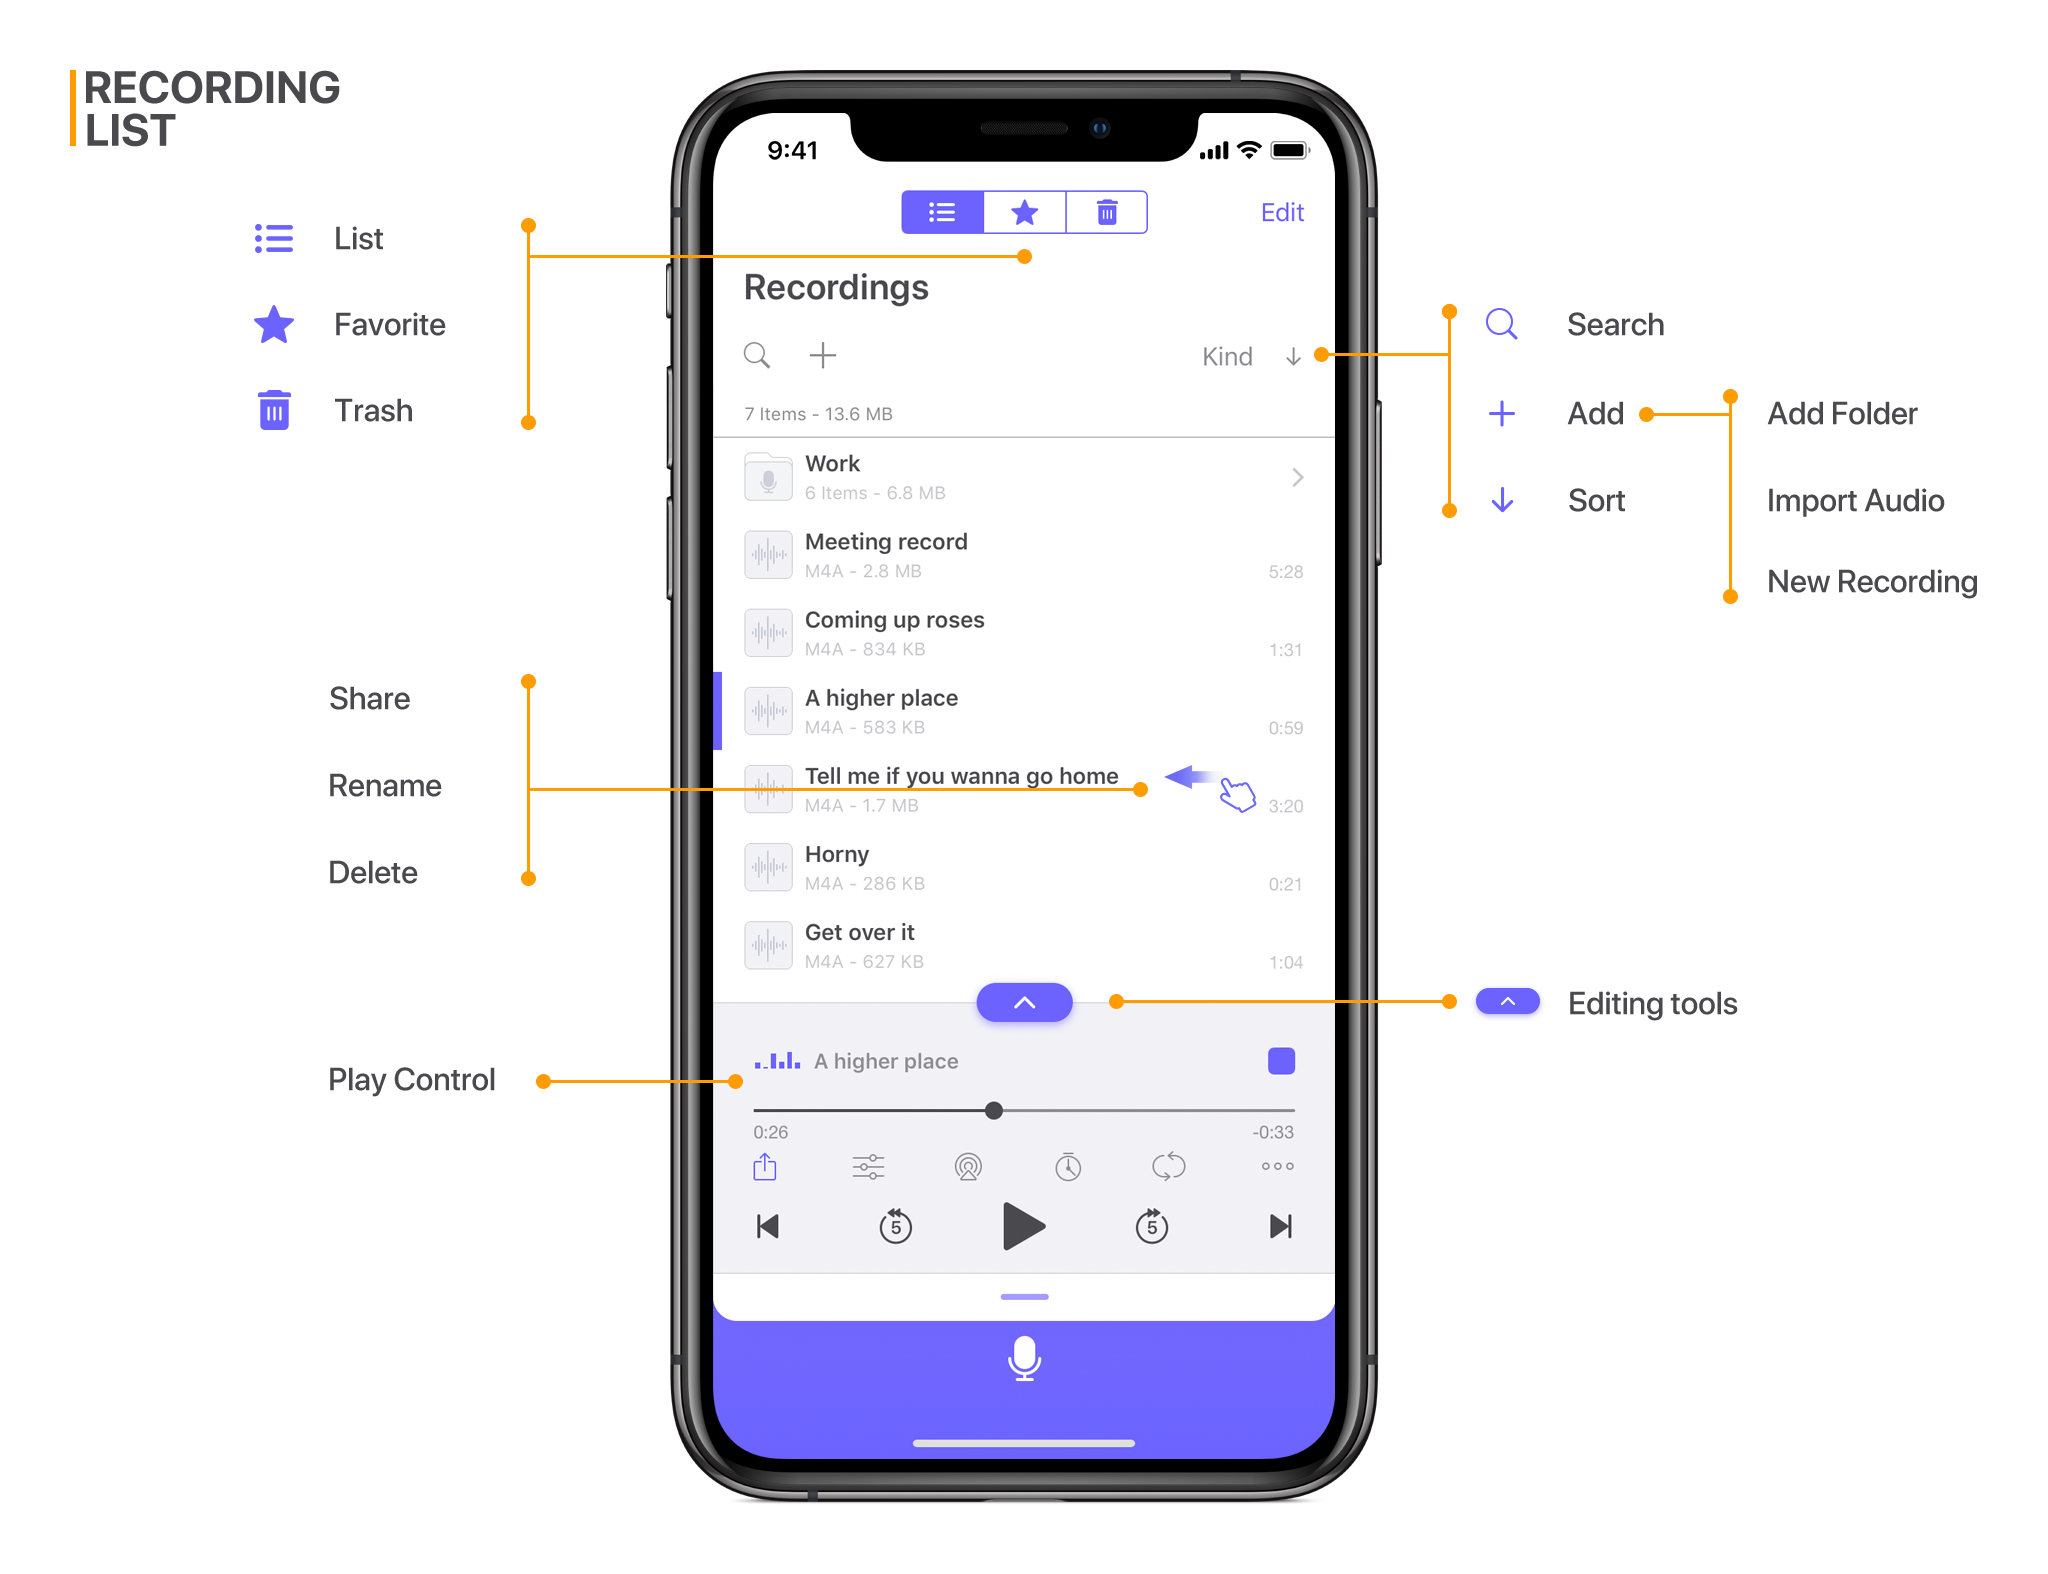
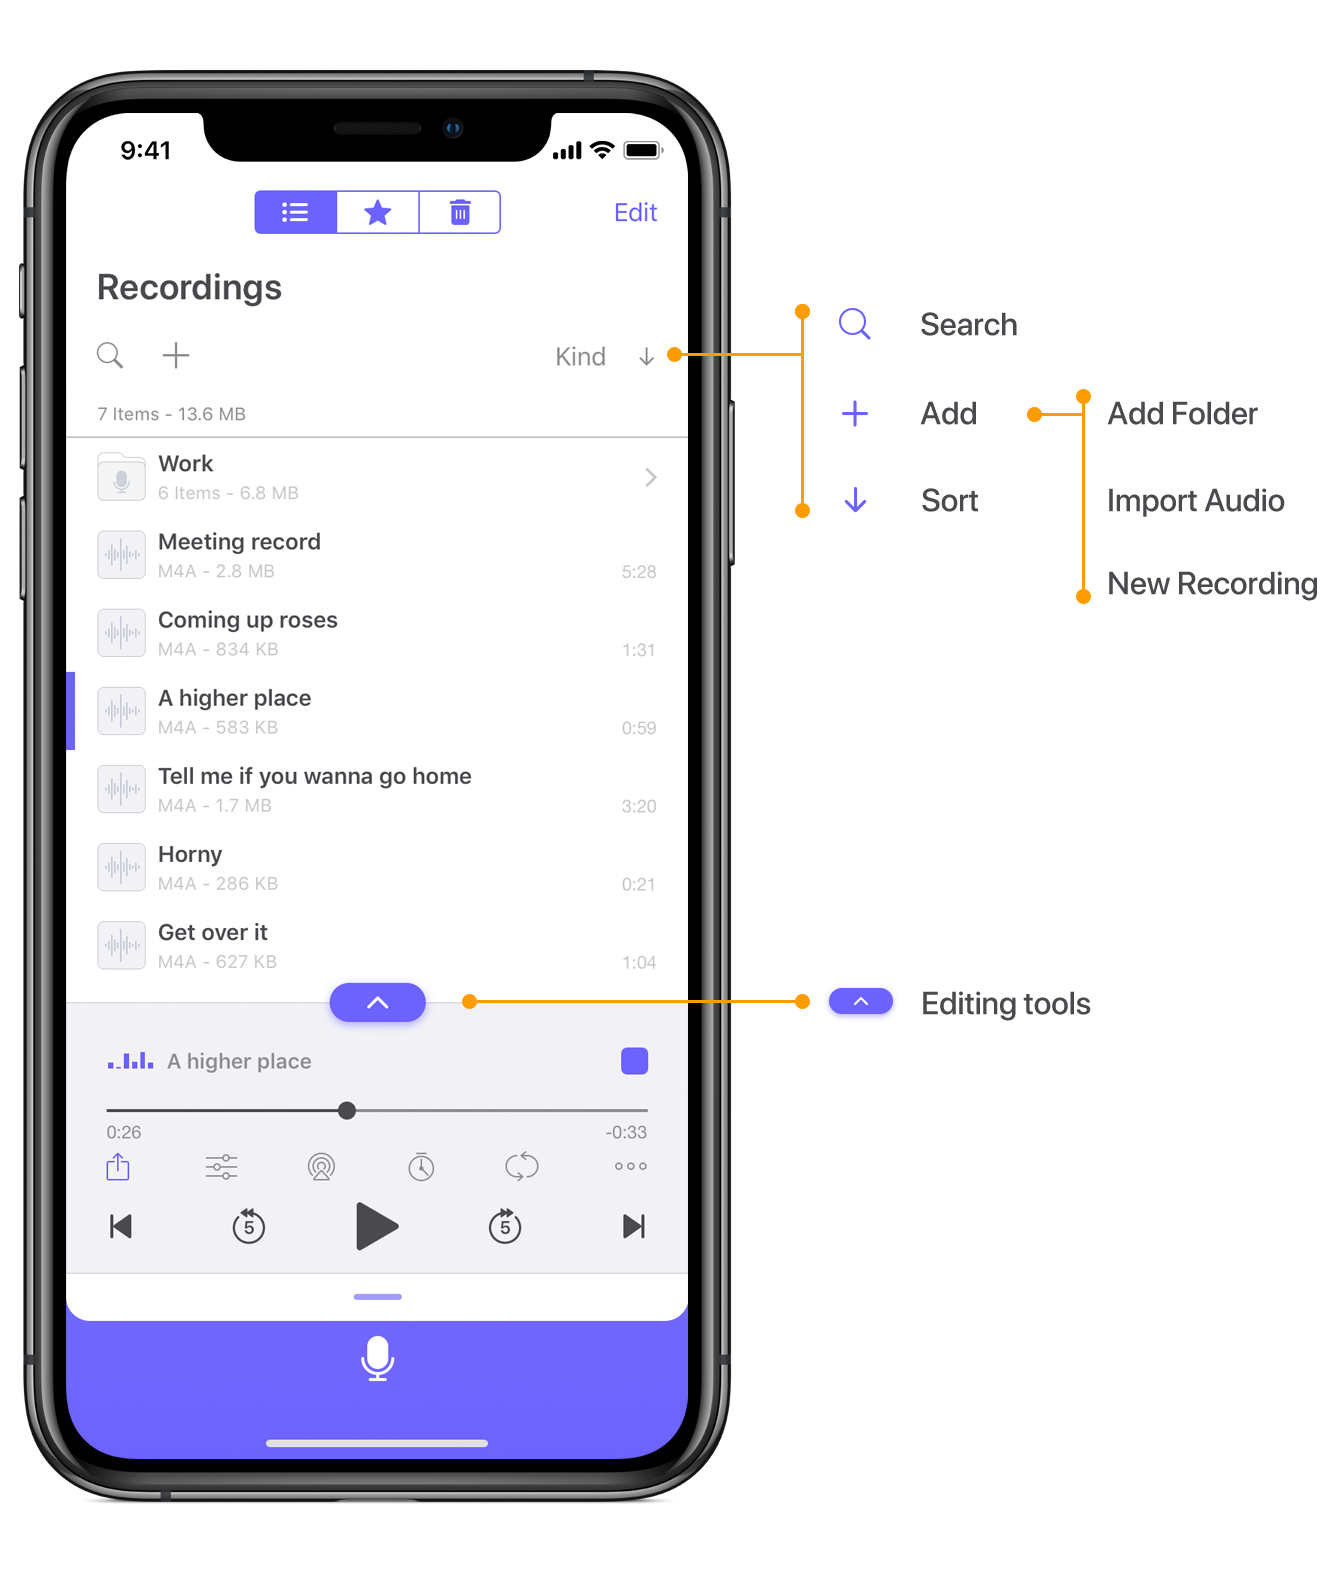
1. Create a folder
Swipe down in the playlist interface to show the “Search”, “+” and “Sort” features. Press “+” - “Add Folder” to create a folder.
2. Sort
Swipe down in the playlist interface to show the “Search”, “+” and “Sort” features. Press the “Sort” button in the upper right corner and sort by Date/Name/Size/Kind/Duration.
3. Search
Swipe down in the playlist interface to show the “Search”, “+” and “Sort” features. Press the “Search” button  and input keywords in the search bar.
4. Import Audio
Swipe down in the playlist interface to show the “Search”, “+” and “Sort” features. Press the “Import Audio”, then select audio to import it.
5. Rename
Swipe left on the recording file, “Rename” button.
6. Delete and Restore
Tap the “Edit” button, and select recordings, then press “Delete” in the lower right corner to delete the recordings. Tap “Trash” item  , “Edit” - select recordings - “Recover” to put back recordings.
7. Duplicate
Tap a recording, then press the  button - “Duplicate” to make a copy.
8. Move recordings to a folder
Tap the “Edit” in the upper right corner, then select recordings. Press thebutton - “Move or Copy”. Select a folder, then press the “Move” to move selected recordings to the folder.
9. Revert to Original
Tap an edited recording, press the “Recover” button  . You can select “Switch to Original”, “Revert to Original” or “Delete Original”.
10. Audio Sharing
“Edit” - Select recordings - “Share” button . Support Facebook, Ins, Message, Email, iCloud, Dropbox, Google Drive, etc.
11. Audio Backup
To Mac:
1. Tap the “Edit” button in the upper right corner and select recordings, then tap the “Share” button - “Wi-Fi File sharing” , an “IP address” will appear in the pop-up, visit the “IP Address” by using Safari and download the recordings.
2. Connect the iPhone to the computer via USB, open the newest “iTunes”, then use the “File sharing” function to export all recordings.
3. Save recordings in iCloud, then open “Finder”-“iCloud” on Mac to access these recordings.
4. Use “Save to Camera Roll” function to save the recordings to “Photos”, then open “Photos” on your Mac to access these recordings.
5. Tap the “Edit” button in the upper right corner and select recordings, then tap the “Share” button and use the “Airdrop” to transfer selected recordings.
To Windows:
1. Tap the “Edit” button in the upper right corner and select recordings, then tap the “Share” button - “Wi-Fi File sharing”, an “IP address” will appear in the pop-up, visit the “IP Address” by using a browser on your computer and download the recordings.
2. Connect the iPhone to the computer via USB, install and open the newest “iTunes”, then use the “File sharing” function to export all recordings.
3. Save recordings in iCloud, log in “iCloud.com” on the computer. You can access these recordings in your iCloud and restore the deleted recordings in the “Deleted recently” item.
4. Use “Save to Camera Roll” function to save the recording to “Photos”, connect your iPhone to your computer via USB, then open “File Explorer” - “Apple iPhone” on your computer, you can access the recordings in mp4 format here.
Simple Recorder on Apple Watch
The recording will be transferred to the paired iPhone automatically.
1. Keep your Apple Watch and paired iPhone close together to make sure that they're in range.
2. On your iPhone, make sure that Airplane Mode is off and that Wi-Fi and Bluetooth are on. To check, swipe up to open Control Center.
3. On your Apple Watch, make sure that Airplane Mode is off and that Wi-Fi and Bluetooth are on. To check, swipe up to open Control Center.
4. There are two recording modes on Apple Watch, “Record on Apple Watch” and “Apple Watch control the paired iPhone to record”. Switch them on the main page of the Voice Recorder on Apple watch.
Other Features
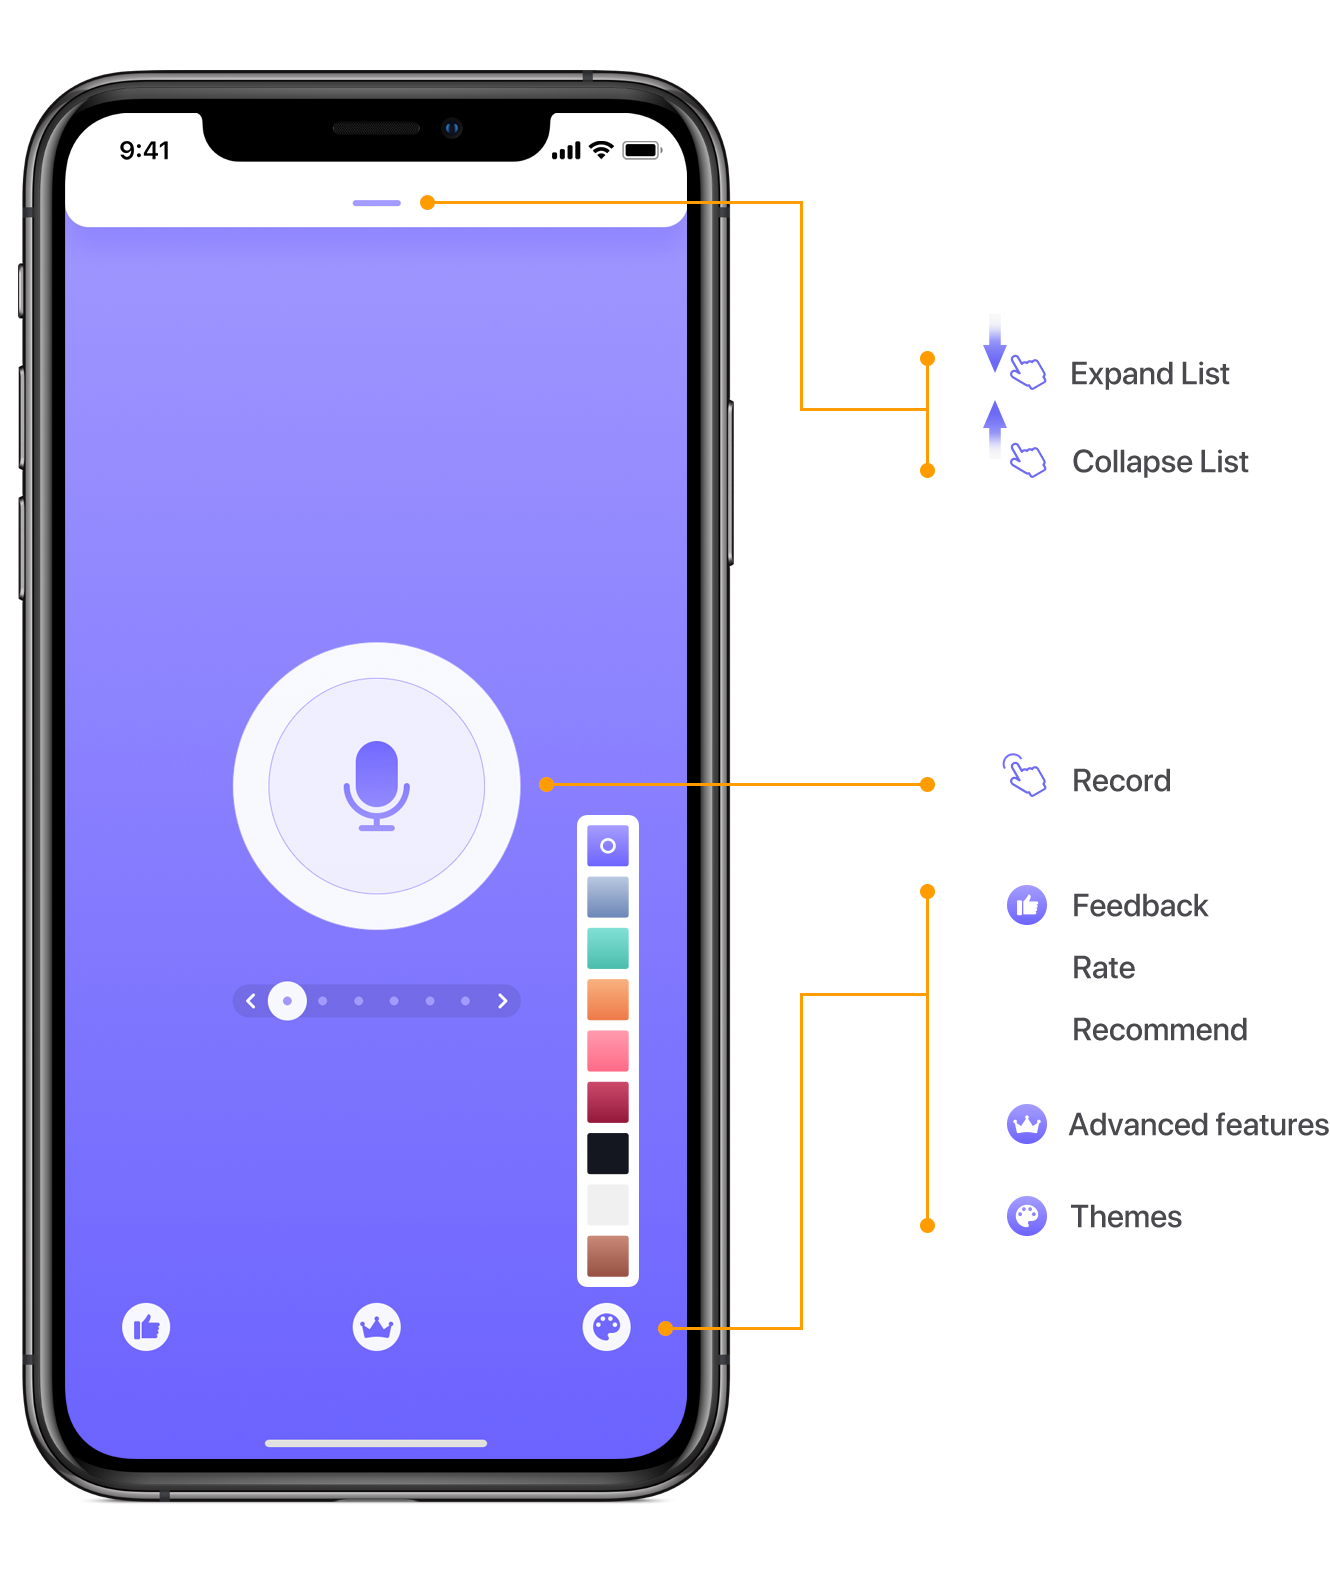
1. Change the theme.
Tap the button in the lower right corner on the main page, select the theme you like.
2. Speech to text
Tap a recording - “UP” button then button. Select a language for recording and then tap the “Audio to text”. You can edit the text and add a cover/title/author to the recording here.